Making silver jewelry in Kuta is a smart Bali shortcut. You learn silversmithing right on Jalan Raya Legian, close to Kuta Beach, so you skip the long trip to Ubud and still leave with a piece you made. The class is set up for a smooth half-day plan, with multiple start times and a mobile ticket.
What I like most is the hands-on pacing: you go from selecting a design to melting sterling silver (925), then shaping, soldering, and finishing with filing and polishing. I also love that the instructors keep things beginner-friendly while still letting you do the “real” work, like hammering and shaping your piece. One thing to think about upfront: you can only make one jewelry item, and the included silver is capped, so very large or heavy designs may cost extra.
In This Review
- Key Highlights You’ll Care About
- Kuta Silversmithing: The Convenient Alternative to Ubud
- Where You Go and What the Setup Feels Like
- Picking Your Design: Your Starting Point
- From Melt to Form: The Silversmithing Process Step by Step
- Melting and preparing the silver
- Hammering and pressing to shape
- Soldering and refining the shape
- Filing and polishing to finish
- How Much Silver You Get (and Why It Affects Your Design)
- If you want more than 5 grams
- Adding Gemstones: Optional, and Not Cheap
- Instructor Support and the Actual Pace of the Class
- Duration varies, but it’s built for a half-day plan
- Class size stays manageable
- Price and Value: Is $45.84 a Good Deal in Bali?
- Best Fit: Who This Class Works For
- Should You Book Kuta Bali Silver Jewelry Making?
- FAQ
- How long is the Kuta Bali silver jewelry making class?
- Where does the class start?
- Is the silver and equipment included?
- How much silver will I take home?
- Can I add gemstones to my design?
- Is there a limit on how many pieces I can make?
- What if I want to use more silver than the included amount?
- Is transportation included?
- Can I cancel for a full refund?
Key Highlights You’ll Care About
- Kuta Beach location (Jalan Raya Legian): you can fit this class without changing your whole itinerary
- Sterling silver 925 included: you work with real silver, not craft substitutes
- Hands-on steps from melt to polish: hammering, pressing, soldering, filing, and polishing are part of the flow
- Patient instruction with real crafting time: names like Artie and Martie show up for clear, helpful guidance
- One wearable souvenir per person: you take home a single piece, typically in the 1–5 gram range
- Optional upgrades cost extra: gemstones add an additional fee if you want them
Kuta Silversmithing: The Convenient Alternative to Ubud
Most Bali craft classes pull you toward the Ubud side of the island. This one keeps you in Kuta—specifically on Jalan Raya Legian, near Kuta Beach. That matters because it makes the experience easy to plug into a day you already planned around the beach.
The class also runs with a variety of start times. Translation: you’re not stuck choosing between sand time and metal time. If your trip is tight, that flexibility is a genuine advantage, not a small perk.
You can also read our reviews of more tours and experiences in Kuta


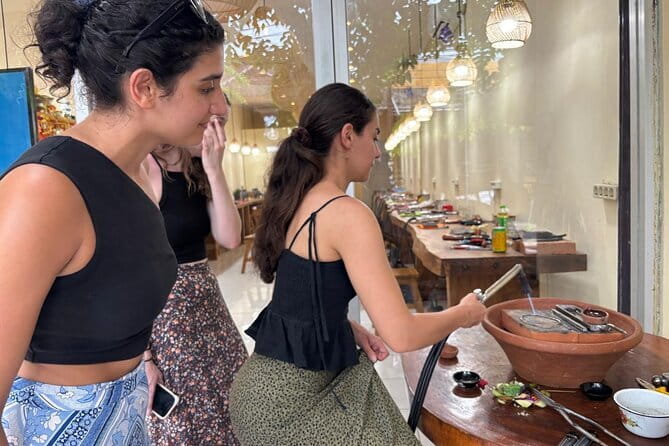
Where You Go and What the Setup Feels Like
You meet at Jl. Raya Legian No.116, Kuta. The activity ends back at the same meeting point, which is helpful if you want to return to a hotel area without backtracking.
This isn’t a huge factory-style workshop. The group size is capped at 22 participants, so it has that small-class feel where instructors can keep an eye on what you’re doing. Also, you get a snack and mineral water, plus free Wi‑Fi, so you’re not starting the project on an empty stomach or cutting your plans short to find a café.
One logistics note: a shuttle is not included, so you’ll want to handle your own transport to Jalan Raya Legian.
Picking Your Design: Your Starting Point
The workshop starts with design selection. You choose what you want to make, and the instructor team walks you through materials and tools based on your choice. This is where the class starts feeling personalized, even though everyone is learning the same core silversmithing skills.
There’s an important limitation that shapes your planning: you can make only one silver jewelry piece per participant. You can still go for something simple or something more detailed, but your final product is one complete item you’ll take home.
Also, you should think about weight early. You’ll receive silver that covers the class and your finished piece, and the final take-home weight depends on your design. If you imagine a chunkier statement piece, it’s worth asking how your design choice affects included silver.
From Melt to Form: The Silversmithing Process Step by Step
This class is built around a clear sequence of techniques, and you’ll see the transformation happen in real time.
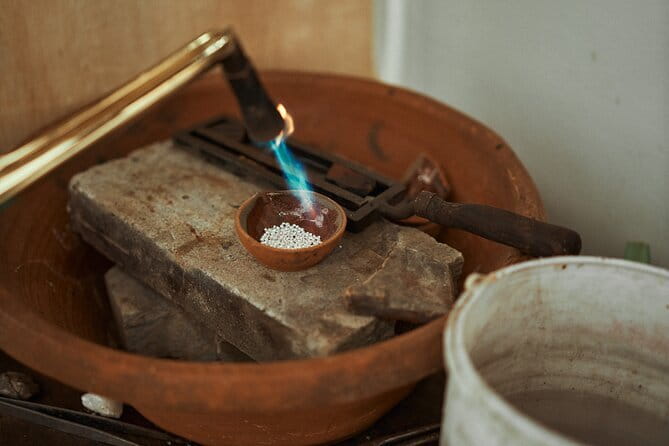
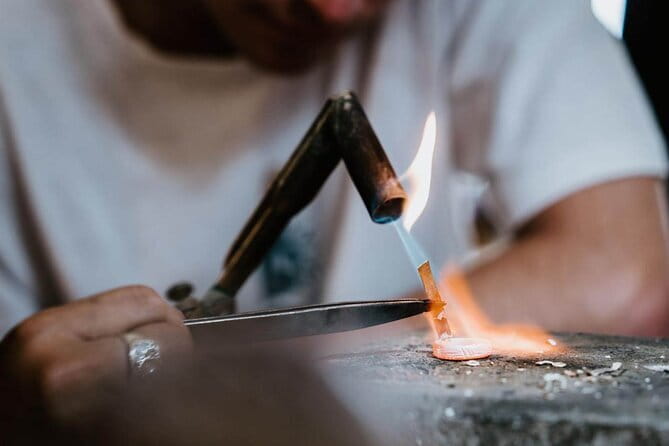
Melting and preparing the silver
You begin by melting sterling silver (925). That step matters because it sets the tone: this isn’t just decorating a pre-made item. You’re working with the metal itself, then shaping it into a form you chose.


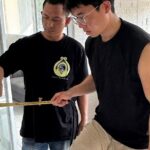
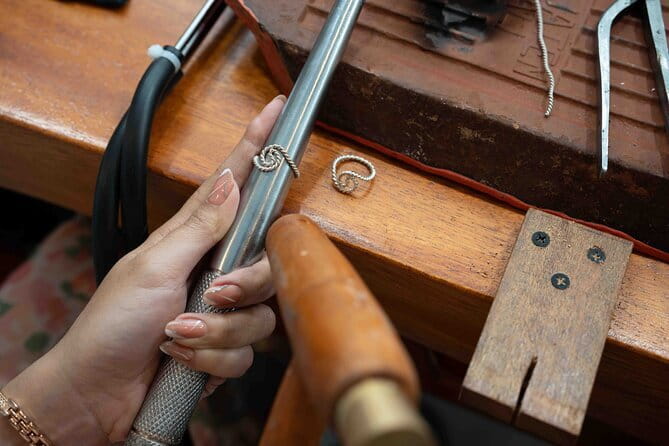
Hammering and pressing to shape
Next comes traditional shaping, including hammering and pressing. This is where you start turning a blob of silver into something that actually resembles your final jewelry concept.
Soldering and refining the shape
As the piece comes together, you’ll move into soldering and more detailed shaping. This part is usually where beginners appreciate patient coaching, because small alignment choices can affect the final look and fit.
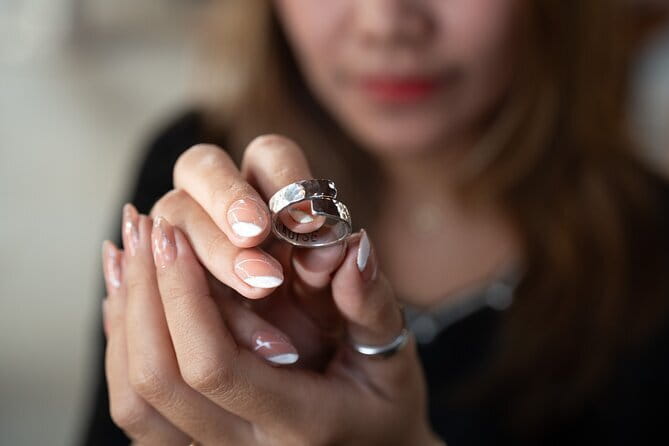
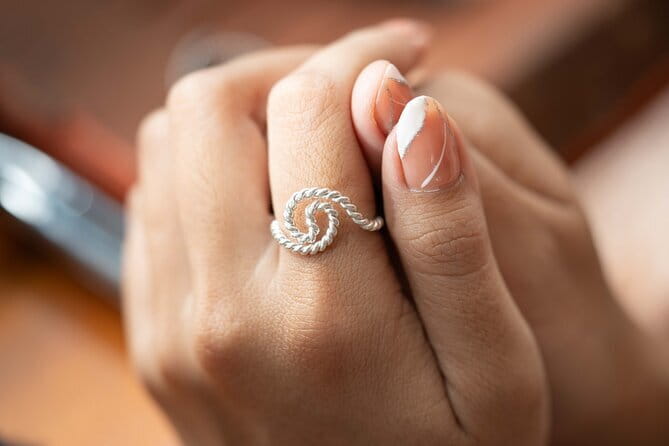
Filing and polishing to finish
The last stage is filing and polishing, which is what takes a handmade piece from rough-and-ready to wearable. The goal is a smooth, shining finish, so it feels like a souvenir you’ll actually keep wearing on a trip memory.
By the end, you walk out with a handmade item that’s directly yours—same day, real craft work, and not something mass-produced.
How Much Silver You Get (and Why It Affects Your Design)
Silver is where this class becomes most practical for decision-making.
The experience includes tools and silver, with a silver allotment described as up to 0.25 ounces (about 7 grams). Your take-home piece is typically described as starting from 1–5 grams, with the final weight depending on your design.
If your piece ends up weighing less than 5 grams, there’s still an accounting rule that treats it as 5 grams for usage. What that means for you: the workshop isn’t trying to nickel-and-dime you on tiny differences. Instead, it’s defining the “included” silver portion fairly for the class.
If you want more than 5 grams
If you go above the 5 gram limit, there’s an additional fee listed as 85,000 IDR per gram. So if you want something oversized or especially heavy, plan for an upgrade cost. It’s one of the only times the class can feel like it may go beyond the base price.
Also, silver can’t be shared with someone else. If you’re traveling as a group and you thought you’d “pool” silver for a big design, that doesn’t work here.
Adding Gemstones: Optional, and Not Cheap
If you want more color, you can add gemstones. The info provided says gemstones have an additional charge ranging from IDR 100K to 500K, depending on the type and size.
That’s a pretty wide range, so the practical move is to decide your priorities:
- If you want a classic silver piece with strong craftsmanship, stick to the silver-only design.
- If gemstones are part of your dream item, treat the gemstone cost as part of your budget planning before you commit to a specific design.
Instructor Support and the Actual Pace of the Class

The class experience is strongly shaped by the instructor style, and the names Artie and Martie show up in positive feedback for patient guidance. The consistent theme is that you get clear instruction on the steps, while the team still leaves you in control of the core crafting actions.
In plain terms: you aren’t just watching. You’re doing the melting, hammering, shaping, and finishing work yourself, with support when technique matters.
Duration varies, but it’s built for a half-day plan
The workshop duration is listed as about 3 hours in the overview, and more specifically as 1.5 to 3 hours depending on the class flow and your design. With a single piece to make, it’s a good fit for travelers who want a meaningful souvenir without sacrificing an entire day.
Class size stays manageable
With a maximum of 22 participants, the pace stays workshop-like rather than assembly-line-like. You should still expect some waiting while the team helps others through key steps, but it’s not the kind of class where you feel lost.
Price and Value: Is $45.84 a Good Deal in Bali?

At $45.84 per person, this class is priced like an activity that’s meant to be worth doing even if it’s not your biggest “Bali thing” of the trip.
Here’s why it can feel like solid value:
- You get all necessary materials and tools
- Sterling silver (925) is included for your piece
- You get a take-home item you made yourself (not a pre-made souvenir)
- You receive snack, mineral water, and free Wi‑Fi, which removes small trip friction
The big value lever is that you’re paying for guided hands-on craft, not just materials. You’re also paying for time and skill transfer: melting, shaping, soldering, filing, and polishing are the real silversmithing steps.
Where value can change is if you start adding extras. Gemstones can add IDR 100K to 500K, and pushing beyond 5 grams adds 85,000 IDR per gram. If you stay within the included silver and choose a design that fits the weight range, the base price is likely to feel more “clean” and predictable.
Best Fit: Who This Class Works For
This is a great match if you want:
- A hands-on Bali experience that ends with something wearable
- A meaningful souvenir you can explain later, because you truly made it
- A craft session close to Kuta Beach, without rearranging your trip to reach Ubud
It’s also a good fit for beginners. The workshop structure is designed for people learning from scratch, and the teaching approach appears to focus on patience and step-by-step clarity.
You might skip this class if:
- You want to make multiple pieces in one session (the class allows one item only)
- You’re set on a very large/heavy design that likely exceeds the included weight
- You don’t want the possibility of added costs for gemstones or extra silver
Should You Book Kuta Bali Silver Jewelry Making?
If you’re in Kuta and you want a souvenir with real craft behind it, I’d book this. The location on Jalan Raya Legian near Kuta Beach is the standout advantage, and the class includes sterling silver 925, tools, and finish work that turns your design into a wearable item.
Before you click confirm, do two quick checks:
- Pick a design you’re excited about that fits the idea of a 1–5 gram take-home piece.
- Decide whether gemstones are a must. If yes, treat the IDR 100K–500K range as part of the plan.
For most people, this is one of those rare activities that’s fun while you’re doing it and still feels worth keeping once you’re home.
FAQ
How long is the Kuta Bali silver jewelry making class?
The class runs for about 1.5 to 3 hours, with the overview describing an approximate 3-hour experience depending on how your piece comes together.
Where does the class start?
You start at Jl. Raya Legian No.116, Kuta, Bali 80361, Indonesia, and the activity ends back at the same meeting point.
Is the silver and equipment included?
Yes. The class includes all necessary materials and tools, and it includes sterling silver (925) for your piece.
How much silver will I take home?
Your take-home jewelry starts from 1–5 grams, depending on your design. If your jewelry weighs less than 5 grams, the silver usage is still accounted for as 5 grams.
Can I add gemstones to my design?
Yes, gemstones can be added for an additional IDR 100K to 500K, depending on the type and size.
Is there a limit on how many pieces I can make?
Yes. Each participant can make only one silver jewelry piece.
What if I want to use more silver than the included amount?
If you go over the 5 gram limit, there is an additional fee of 85,000 IDR per gram for more than 5 grams of silver.
Is transportation included?
A shuttle is not included, so you’ll need to arrange your own way to the meeting point.
Can I cancel for a full refund?
Yes. Free cancellation is available, and you can cancel up to 24 hours in advance for a full refund. Canceling less than 24 hours before the start time is not refunded.